Trees look simple until you try to paint one. Then the problems start. The trunk looks like a pole. The foliage looks like a green ball. The tree sits on the painting instead of growing in it.
The cause is almost always the same. The painter starts with the leaves, the smallest and least important part of a tree. A believable tree is built in the opposite order. Structure first. Big masses second. Light and shadow third. Detail last, and only a little of it.
This article covers that order for both acrylic and watercolor. The seeing is the same in both mediums. The handling is not.
Start with the structure
A tree is a structure before it is a cloud of green. The trunk carries the weight. The branches carry the foliage. If that structure is wrong, no amount of leaf detail will save the painting.
Follow a real tree from the ground up.
- The trunk tapers. It is widest at the base and narrower as it rises. A trunk drawn with two parallel lines looks like a pipe, not a tree.
- Branches split and get smaller. A branch divides into two smaller branches. Those divide again. Each division is thinner than the part before it.
- Branches reach in all directions. They do not grow only to the left and right like arms. They come forward, go back, and rise at angles.
- The outer branches are fine. By the time the structure reaches the edge of the canopy, the twigs are thin and partly hidden by foliage.
Draw that skeleton lightly before you paint any green. A few lines are enough. You are checking proportions and direction, not making a finished drawing.
Trees also lean, bend, and lose branches. A perfectly straight and symmetrical tree is rare in nature. A slight lean makes a painted tree feel observed instead of invented.
The canopy is masses, not leaves
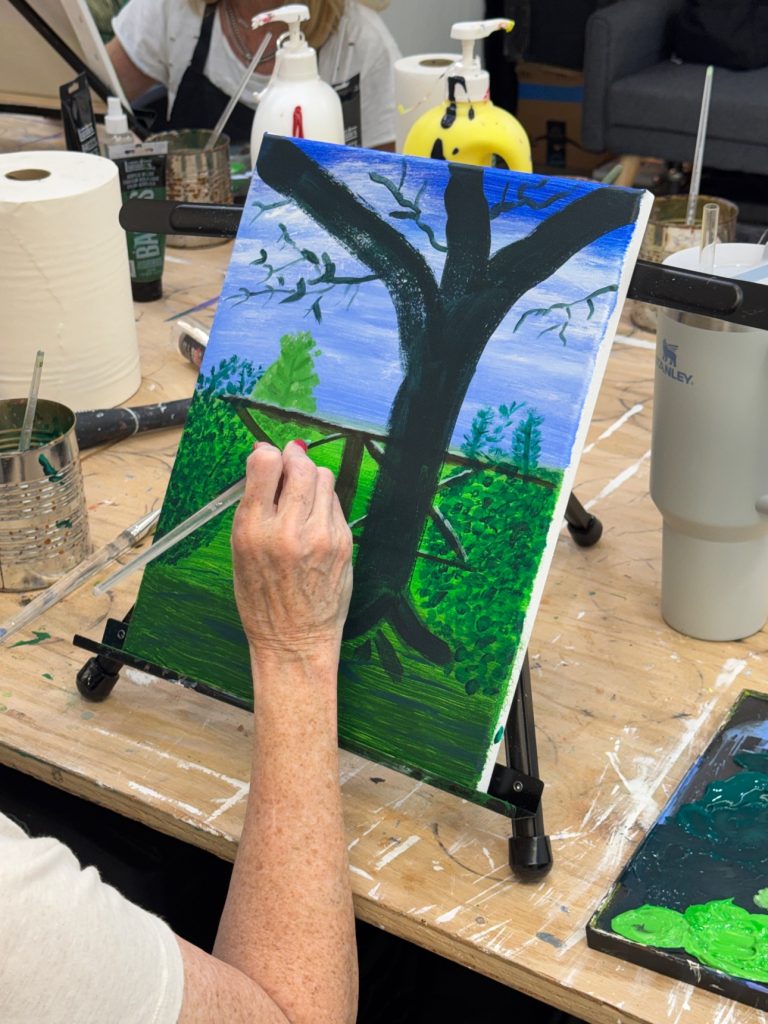
The foliage of a tree, called the canopy, reads as a few large masses. It does not read as thousands of separate leaves. From any normal painting distance, your eye sees clumps, shadows between clumps, and a ragged outer edge.
So paint clumps. Group the canopy into three to five big masses before you begin. One sits high and catches the most light. One drops lower on the shaded side. One may hang separate from the rest, with sky behind it.
This grouping is the single biggest step forward for most beginners. A canopy painted as a few uneven masses already looks like a tree, even before any detail is added.
Keep the masses unequal. Equal, round clumps placed evenly around a trunk produce the lollipop tree. Nature is lumpy. Let one mass be large, another small, and let the gaps between them vary.
Light and shadow on the canopy
Once the masses are placed, treat the whole canopy as one form turning in light. It helps to think of it the way you would think of any rounded object. It has a lit side, a shadow side, and a turning edge between them.
- Find the light direction first. Decide where the sun is before you mix any green. Every mass in the canopy must agree with that one decision.
- Paint the shadow masses darker than you expect. The inside of a canopy is genuinely dark. Beginners paint it too light, and the tree loses its roundness.
- Keep the lightest light small. The brightest foliage sits where the sun strikes directly, usually on the top and on one side. If everything is bright, nothing is.
- Use a middle value for most of the tree. Most of a canopy lives between the deep shadow and the sunlit top. That middle range does most of the work.
Work from the general to the specific. Block in the shadow side as one connected shape. Then add the middle masses. Then place the lit areas on top. Our article on painting clouds and skies makes the same point about clouds. Big forms in light obey the same rules wherever they appear.
Sky holes and edges
Sky holes are the small gaps of sky that show through a canopy. They matter more than most painters realize. A canopy painted as a solid silhouette looks heavy and false, because real foliage is broken.
Place a few sky holes where branches divide and near the outer edges of the canopy. Keep them small and uneven. A row of equal holes looks like decoration.
The color of a sky hole is the color of the sky behind the tree, often a little darker and cooler than the open sky nearby. In acrylic you can paint the holes in as you build the foliage. In watercolor you usually have to plan them, because the light sky must be left or laid in first.
Edges need the same attention. The outer edge of a canopy is ragged, with bumps, gaps, and fine twigs against the sky. Avoid a smooth, hard outline all the way around. Lose the edge in a few places. Keep it sharper in a few others.
Tree color, distance, and season
Green is the color beginners trust most and question least. That is a mistake. Tree greens vary widely, and the tube green used straight and everywhere is one of the main reasons painted trees look artificial.
At the basics level, three habits help. First, mix your greens rather than using one green for the whole tree. A lit mass and a shadow mass should not be the same green at different brightness only. The shadow side usually cools down. The lit side usually warms up. Second, vary the green from tree to tree in the same painting. Third, soften strong green with a little of its opposite or with an earth color. Small adjustments are enough. Leaves in sunlight are rarely a pure, saturated green.
Distance changes tree color in a predictable way. A near tree has strong contrast, clear darks, and the most color. A far tree is paler, bluer or greyer, and flatter. Its darks are lighter and its edges are softer. Paint a distant tree at full strength and it jumps forward and breaks the space of the painting.
Season changes the job too. In general terms, new growth tends to be brighter and more yellow in its green. Mature summer foliage is deeper and heavier. Later in the year, many trees warm toward yellow, orange, and brown, and the canopy thins. You do not need exact species knowledge to use this. Paint the color that is actually there.
Painting trees in acrylic
Acrylic suits trees well because it is opaque and can be layered. You can build dark over light, correct shapes, and add fine branches at the end.
A reliable order looks like this:
- Sketch the structure lightly. Trunk, main branches, and the outer shape of the canopy.
- Block in the canopy shadow first. Use one dark, muted green for the whole shadow side. Let it be a simple connected shape.
- Add the middle masses. Paint the clumps that sit between shadow and light. Overlap them into the shadow shape so the canopy stays connected.
- Paint the trunk and main branches. They pass behind and through the foliage. Parts of them will be covered later, and that is fine.
- Add the lit foliage last. Use smaller touches of the lightest green on the top and the sunlit side only.
- Finish with a few fine branches and twigs. Use a small brush or the edge of a larger one. A few strokes are enough. Too many turn into scratches.
Texture belongs at the end. A dry brush dragged lightly over dry paint can suggest rough foliage on the lit masses. Keep that texture off the shadow side. Shadow is quieter and smoother.
Painters who want this layered approach in a structured setting can look at the acrylic painting course.
Painting trees in watercolor
Watercolor asks for the opposite order. The paint is transparent, so light values must come first and dark values go over them. You cannot cover a dark mistake with light paint.
A reliable order looks like this:
- Plan the lights before you wet the paper. The sky, the sky holes, and the lightest foliage must be decided at the start.
- Lay a pale wash for the lit foliage. Keep it weak. You can always deepen a wash later. You cannot lighten one that went too dark.
- Add the middle masses while judging the drying. A wash painted into a damp wash softens and spreads. A wash painted on dry paper keeps a harder edge. Trees need both kinds of edge.
- Build the shadow side in one or two stronger washes. Let each layer dry before the next, or the colors turn muddy.
- Paint the trunk and branches late. Dark branches over dry foliage washes stay clean and sharp. Thin branches can be lifted or scratched out in places, but drawing them in with a small brush is more reliable.
- Stop early. Watercolor trees are ruined by one wash too many. The freshness of the foliage depends on leaving passages alone.
Because the order cannot be reversed, the watercolor painting course is a useful place to practice planning a painting before the first wash goes down.
Winter and leafless trees
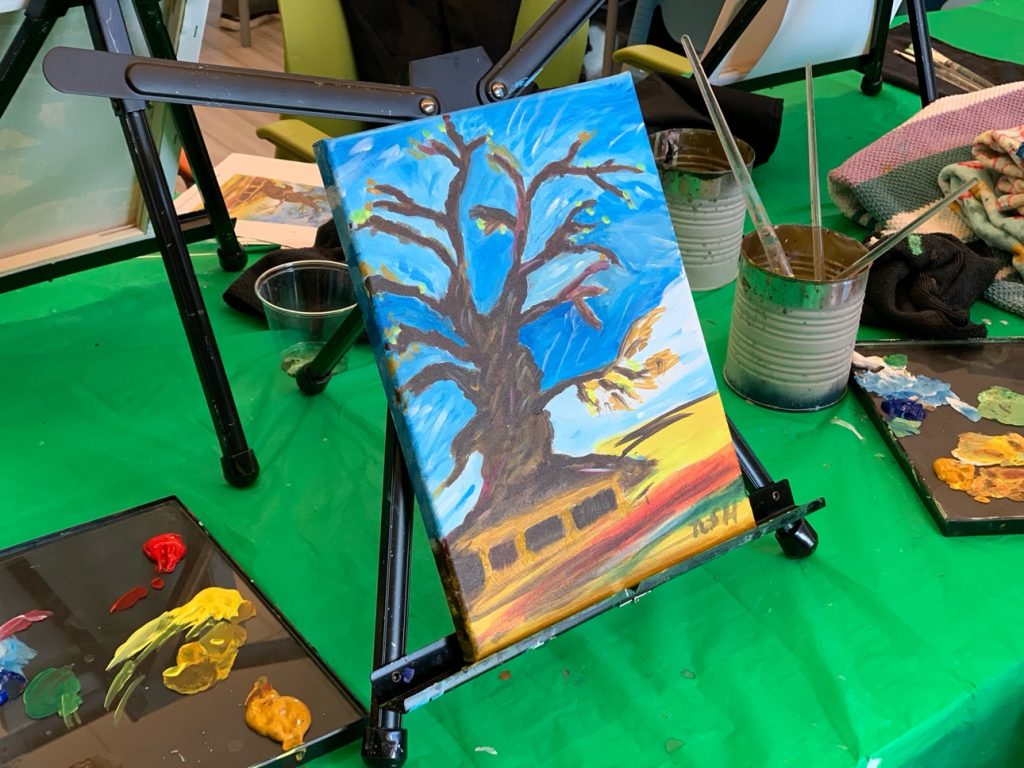
A leafless tree is a gift. The whole structure is visible, and painting it teaches the branching pattern that summer foliage hides.
The rules from the first section apply without the canopy. The trunk tapers. Branches split into smaller branches. The finest twigs sit at the ends and at the top. Beginners usually draw branches that stay the same thickness and end too suddenly. Real branches thin out gradually and divide many times before they disappear.
Values are simpler but still matter. A bare tree against a pale sky is mostly a dark shape, but it is not one flat dark. The side away from the light is darker. Twigs at the edges catch light and can be much paler. In watercolor, a leafless tree is often one confident wash for the trunk and main branches, then finer strokes. In acrylic, you can build the fine work slowly over a dry sky.
Paint a few bare trees from observation and your summer trees will improve. You will know what the foliage is hanging on.
The common mistakes
Most weak painted trees come from a short list of habits.
- The lollipop tree. A straight trunk with a round ball of green on top. The fix is structure and uneven masses.
- Painting every leaf. Thousands of small dabs in one even texture. The fix is to paint clumps and save detail for a few spots only.
- Green straight from the tube, everywhere. One flat green for sun and shadow, near and far. The fix is mixing and varying the green.
- The centered, vertical trunk by default. A trunk placed dead center and perfectly upright in every painting. The fix is to place trees off center, let them lean, and vary their sizes.
- Branches that do not divide. Limbs that run from trunk to edge at one thickness. The fix is to split them and thin them as they go.
- Foliage with no shadow. A canopy in one middle value. The fix is a darker, connected shadow side.
- A hard outline all around. The canopy cut out like paper. The fix is broken edges and a few sky holes.
Simple exercises that work
- The skeleton study. Draw or paint ten bare trees, branches only, no foliage. Work small and fast. You are learning how branching works.
- The three value tree. Paint one tree using only three values: dark, middle, and light. No detail allowed. If the tree reads clearly, your masses are right.
- The same tree in both mediums. Paint one tree in acrylic, then the same tree in watercolor. The comparison teaches the order each medium demands.
- The distance row. Paint the same simple tree shape three times: near, middle distance, and far. Change only value, color strength, and edge sharpness.
- The timed canopy. Paint one tree against a short time limit. Speed forces you to place masses instead of dabbing leaves.
Learning to paint trees in a class
Trees are a good subject for learning in a class because the mistakes are visible and fixable. A teacher can show exactly where the shadow side broke down or where a trunk stopped tapering.
Art Be You is Bartosz Beda’s art academy in Richardson, Texas. It offers evening painting classes for adults, with an acrylic painting course and a watercolor painting course taught by Bartosz Beda, an artist, painter and art teacher. Classes are small, limited to six seats, and materials are included in the classes. Art Be You also offers workshops, private lessons, and gift cards. Current dates, price, and availability are listed on the class pages, so check those pages rather than relying on any general description.
If trees are the part of your landscapes that never convince you, start with the structure on your next painting and judge the result honestly. Then look at the acrylic painting course and the watercolor painting course to see which medium fits the way you want to learn. You can see Bartosz Beda’s own work at bartoszbeda.com and read more about the academy on the art academy page. Class work and painting examples also appear on the Art Be You Instagram and Facebook pages.