A look inside my Richardson studio this week, where my students tackled monochromatic acrylics, transparent watercolors, and the challenge of observation.
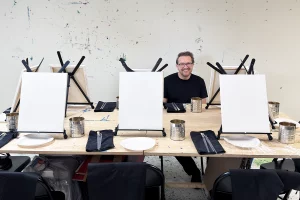
Welcome back to the Art Be You blog. It has been a busy, heads-down week in my studio in Richardson, TX. When I am not working on my own professional painting practice, I dedicate my Tuesday and Thursday evenings to teaching. Sharing what I know with adult students here in DFW area is a process I enjoy, mainly because it forces me to articulate the exact visual problems I have to solve on my own easel every single day.
This week, I want to give you a behind-the-scenes look at what my students actually do when they step into the studio. We tackled two very different challenges: a strict monochromatic value study in acrylics, and a complex lesson on transparency using watercolors. The progress I am seeing from the participants is fantastic. It is a constant reminder that painting is a muscle. The more you work it, the stronger and faster your observational skills become.
Join my upcoming studio sessions:
Tuesday Acrylics: https://www.artbeyou.com/acrylic-painting-course
Thursday Watercolors: https://www.artbeyou.com/watercolor-painting-course
- Time: 6 PM to 9 PM
- Details: All materials are included.
- Classes are strictly limited to 6 seats per group to ensure high-level, personalized instruction.
Tuesday Night: The Power of Black, White, and Gray
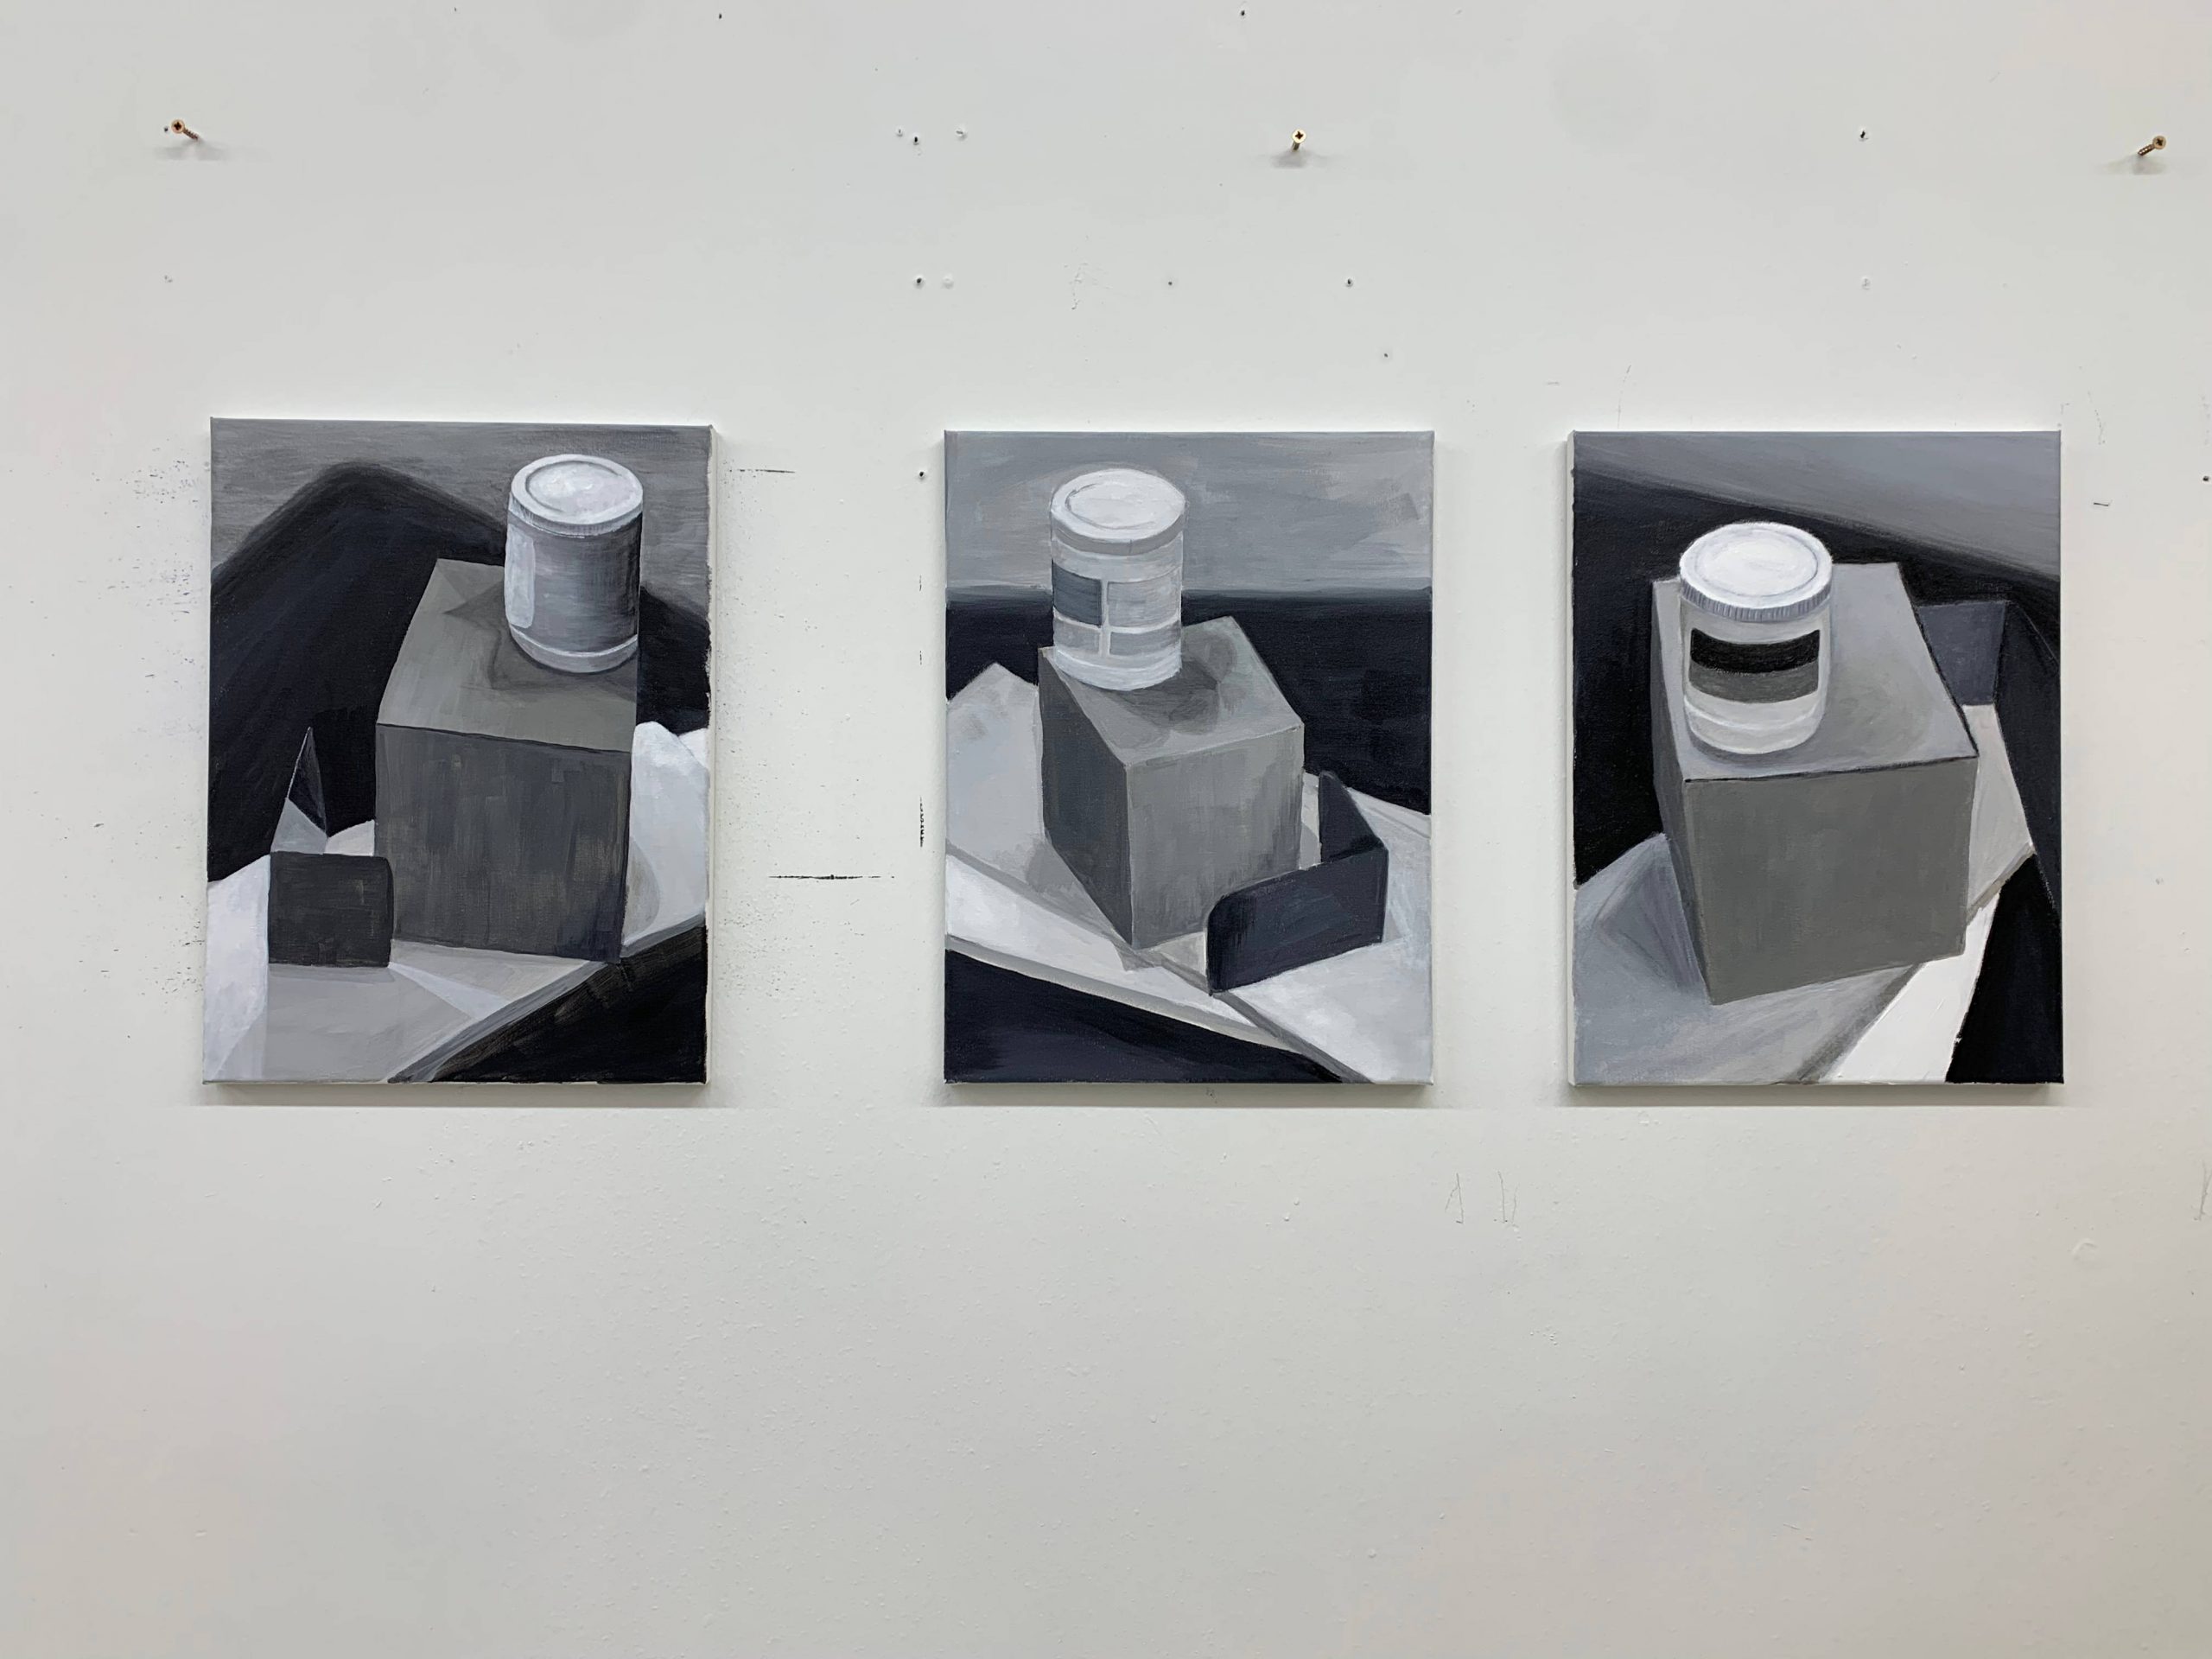
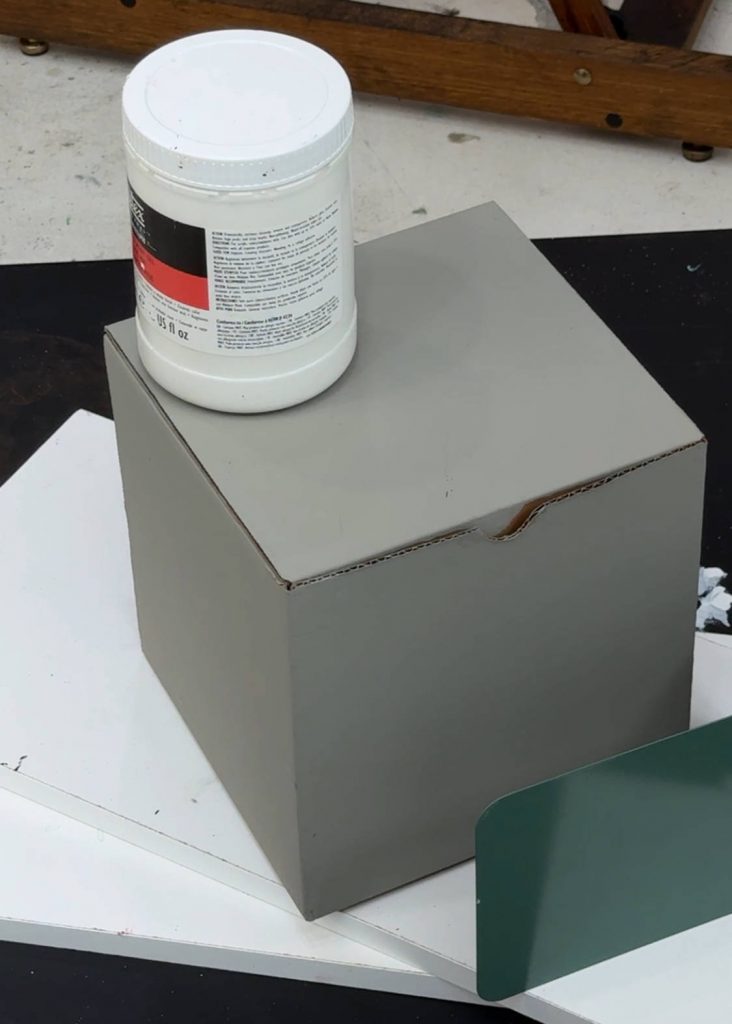
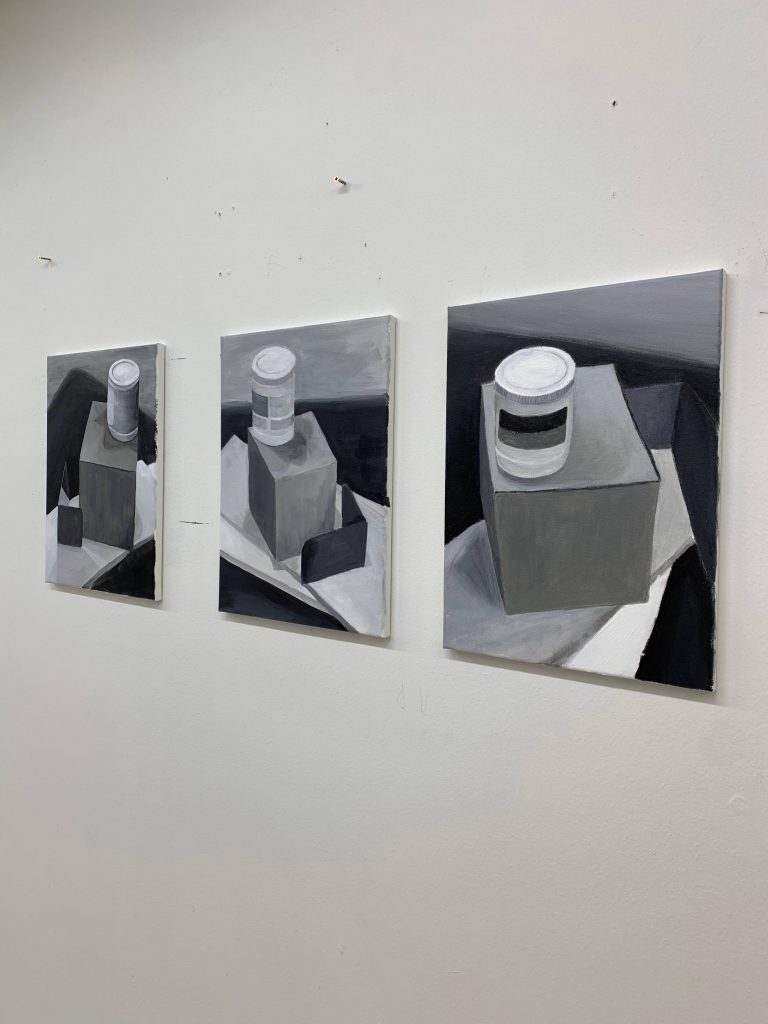
On Tuesday night, I set up a very simple still life for the acrylic group. If you look at the reference photo, you will see it is just a white plastic tub sitting on top of a gray cardboard box, surrounded by a few dark elements in the background. It looks like an ordinary setup, but as a painting subject, it is incredibly demanding.
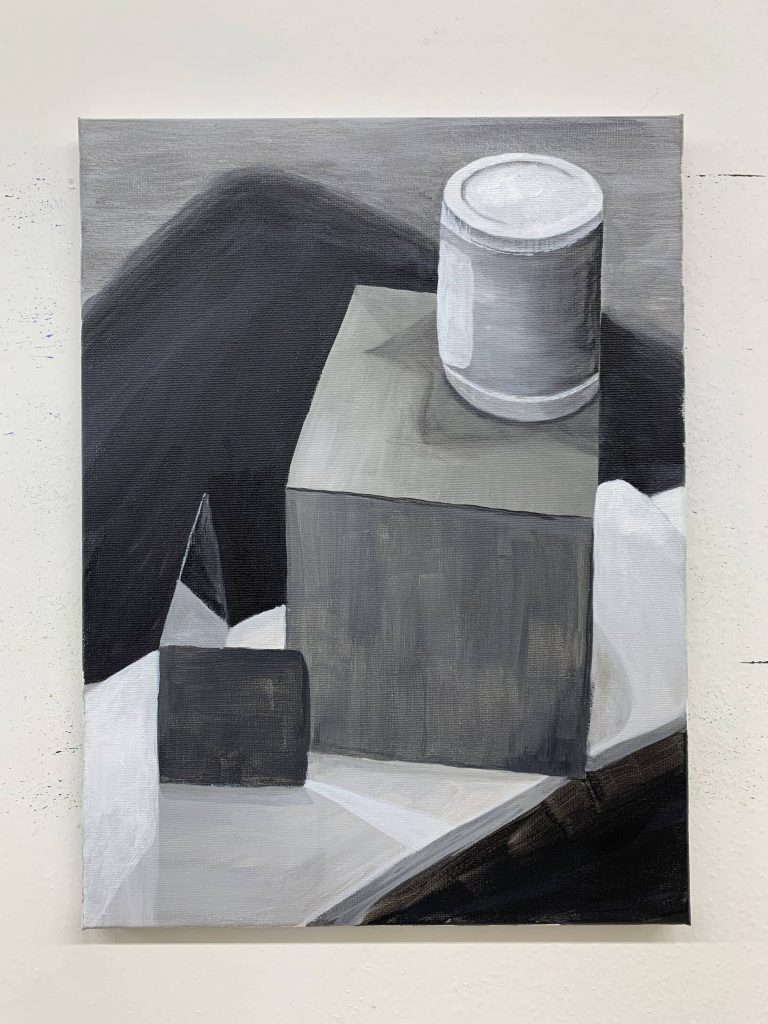
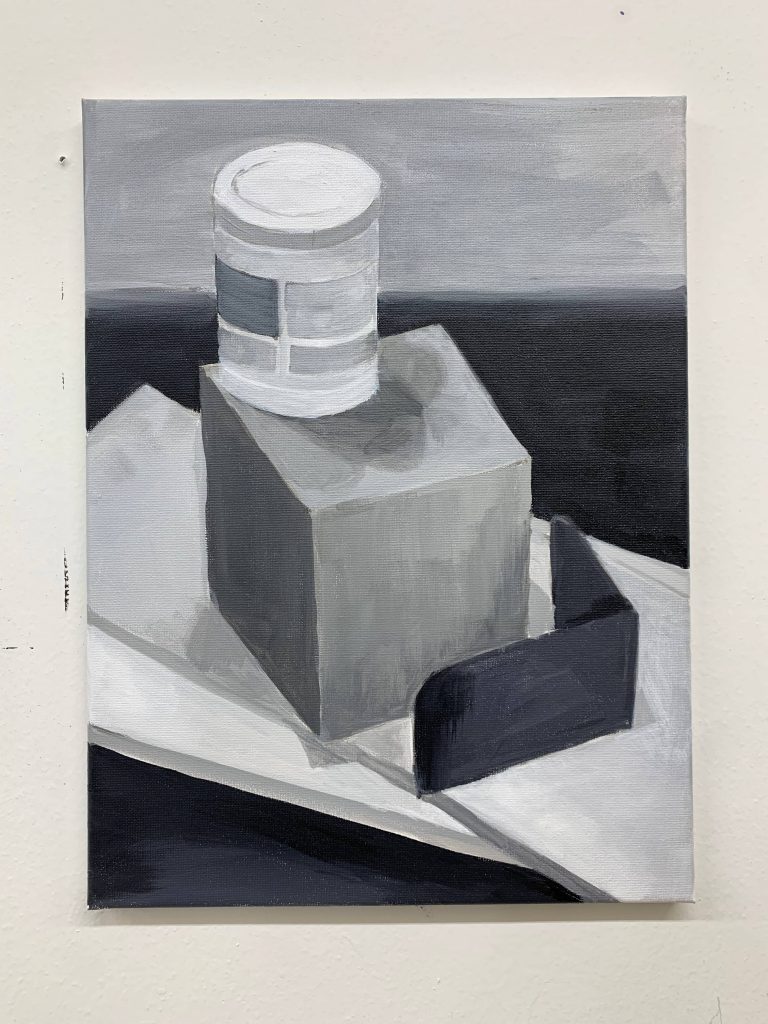
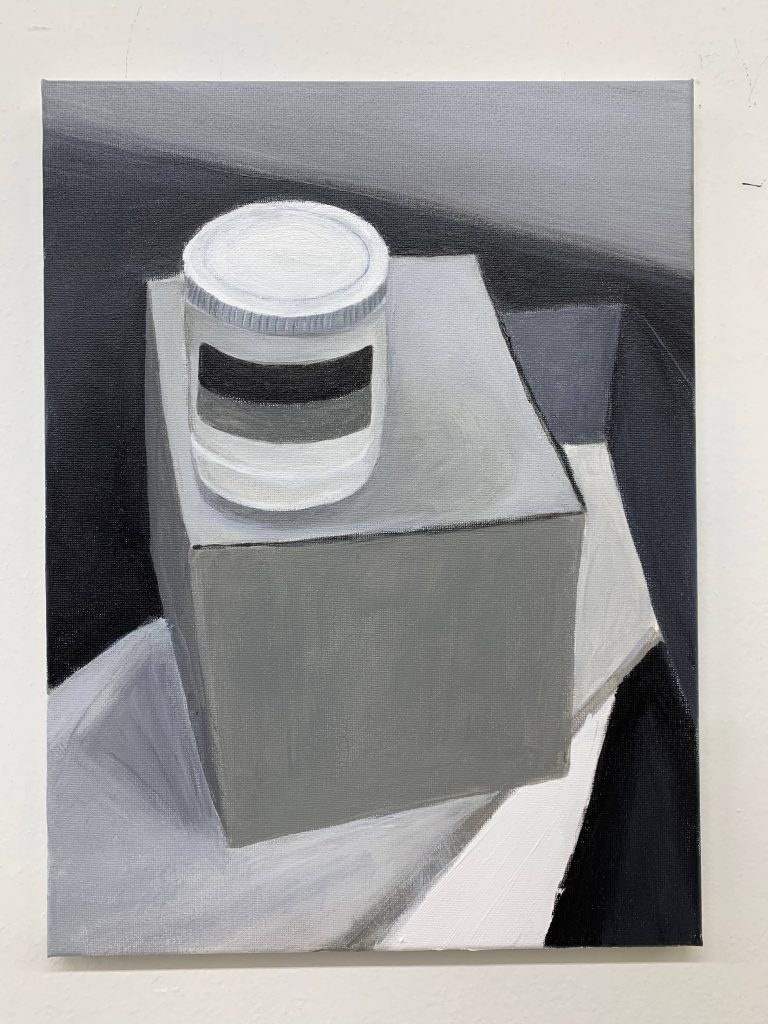
For this session, we painted purely observational pieces in a monochromatic value scale. I restricted the students’ palettes entirely. They were only allowed to use Ivory Black, Mars Black, grays, and white. We limited the observation to those specific tones to ensure that, within our three-hour session, my students were able to establish the entire value scale of the painting from the first mark to the finish.
When we started the painting, I did not let anyone use pencils. Pencils can easily become a crutch. Instead, my students briefly used a viewfinder to find their composition and lock in their proportions. Then, they went straight in with the paint. They drew the initial forms directly with their brushes and moved immediately to pre-mixing and applying their colors.
This method does two very specific things. First, it teaches the necessary speed of painting. Second, it forces the painter to make quick, confident decisions. The goal was to establish the entire groundwork of the painting within the first hour and a half. Once that base is locked in, the next hour and a half is dedicated to picking out the focal point. We look for that main triangular focus of the composition where the viewer will spend more than three seconds of their attention. That focal point is where you build the actual story of the painting.
An Old Studio Rule I Still Use Today
This brings me to a rule that I was taught back in art school when I was first learning observational painting. My mentor told me that even though there is a massive amount of information in a still life (the composition, the light, the specific color values, and the surrounding environment) you cannot paint everything at once.
The rule is this: whether you are given two hours, three hours, or six hours for a session, at any given moment when you have to walk away from the easel, the painting should look interesting.
Even if the piece is completely unfinished, it should give the viewer something compelling to look at. They should be able to look at the canvas at any given stage and always find something to enjoy in it. That concept is crucial, and it is one of the main goals I want all of the participants in my acrylic group to learn and focus on. There is always a lot of information to take in, but we can learn something from every single stage of the painting process, and the viewer should be able to as well.
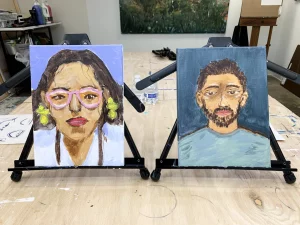
If you look at the picture, you will see the three final results of this painting session, which I think went really well. The results are always dependent on the experience and current skills of each person, and those skills are built up over time. But dedicating that set time to work in a small group helps immensely. When my students take a step back and look at the other paintings happening in the room, it trains their eye. They grasp different techniques and visual solutions from the surrounding painters to learn from.
Ready to build your painting skills?
- Tuesday Acrylics: https://www.artbeyou.com/acrylic-painting-course
- Thursday Watercolors: https://www.artbeyou.com/watercolor-painting-course
- Time: 6 PM to 9 PM
- Details: All materials are included. Classes are strictly limited to 6 seats per group to ensure high-level, personalized instruction.
Thursday Night: Capturing the Illusion of Glass
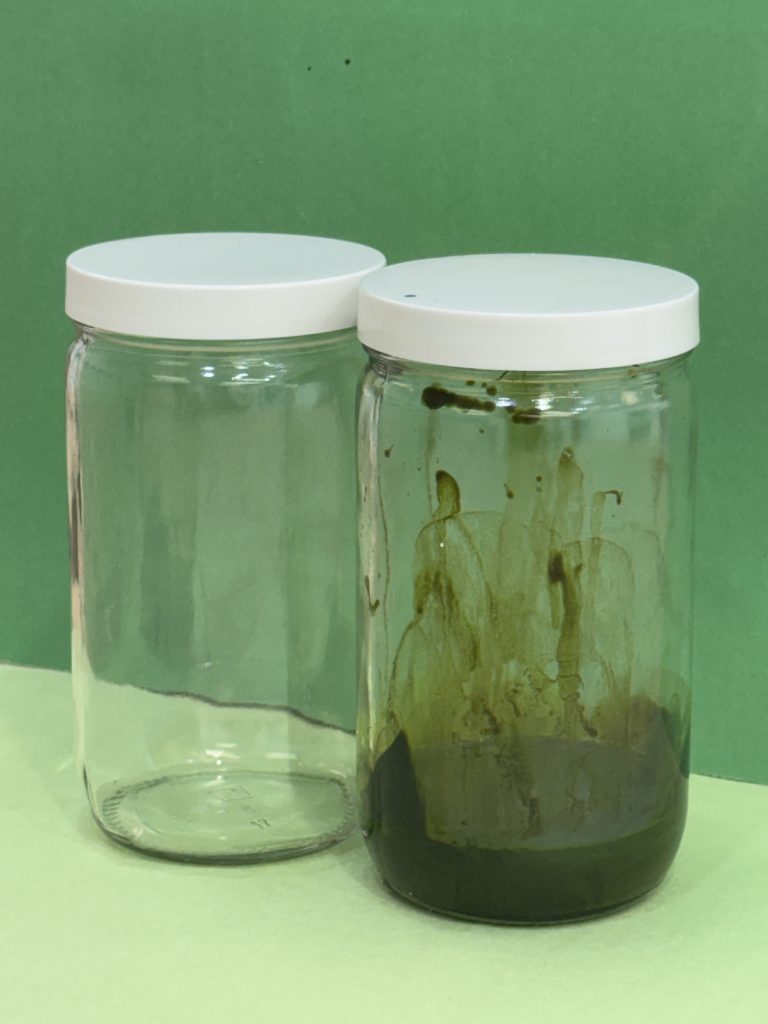
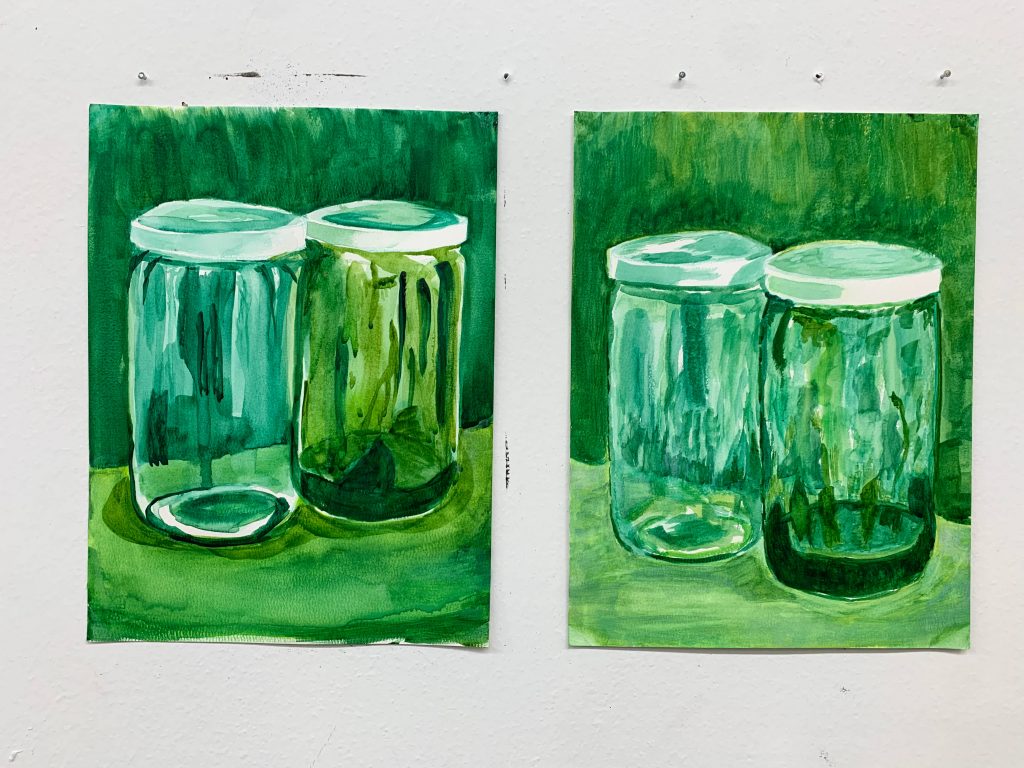
For my Thursday watercolor class, we shifted gears. I set up another simple still life, which you can see in image. This one featured a bright green background and two glass jars. The absolute goal for this session was to achieve as much transparency and as realistic a look of glass as possible.
This is not an easy exercise. It is especially tough if you do not have much experience painting glass and are still figuring out how to improve your watercolor skills. To make it manageable, we broke the process down into easy steps to follow as technically, every painting follows these rules of depth. We started from the far back, laying down the background washes first. Then, we moved to the base of the painting, which represents the table surface. Finally, we gradually moved to rendering the jars themselves.
When you paint glass jars, you always have to observe two main things: the light that comes in and reflects off the exterior surface, and the light that passes completely through the glass, picking up all the colors surrounding it. Because of this, the background and the base surface are incredibly important. To make it even more challenging, glass often contains something inside it. In this case, one of the jars contained leftover green paint, which heavily affected the final result and the reflections happening inside the jar. It was vital to get that exact level of paint and reflection correct.
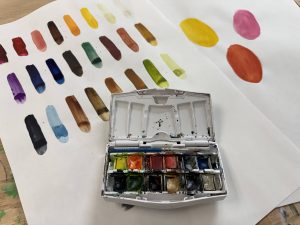
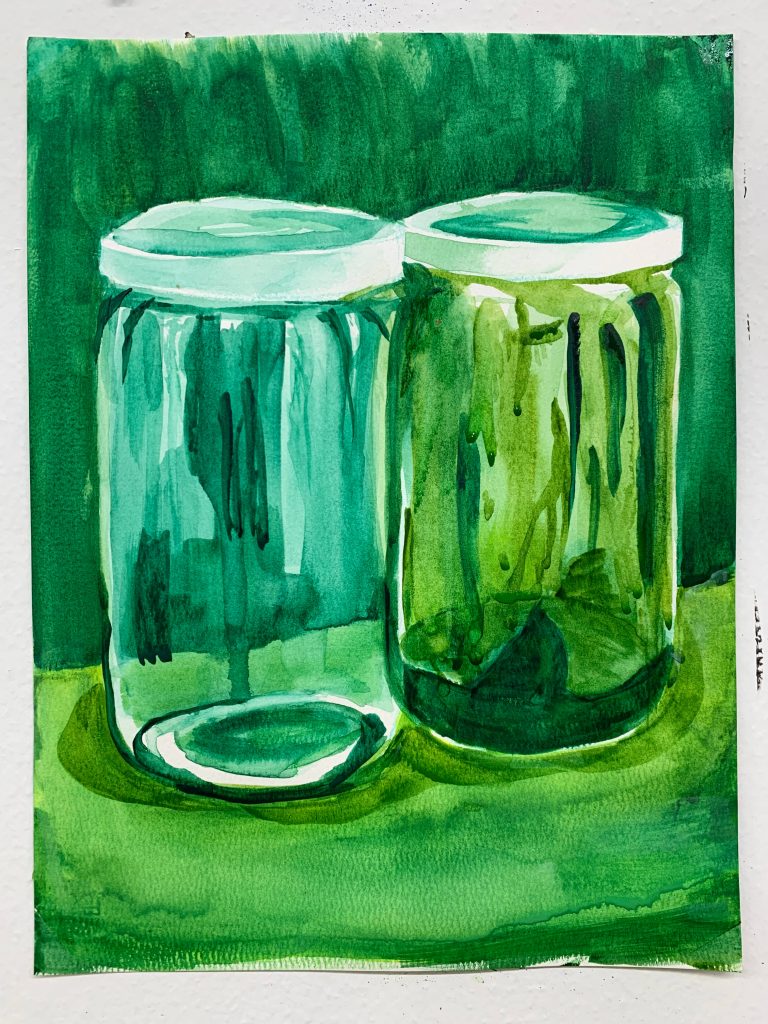
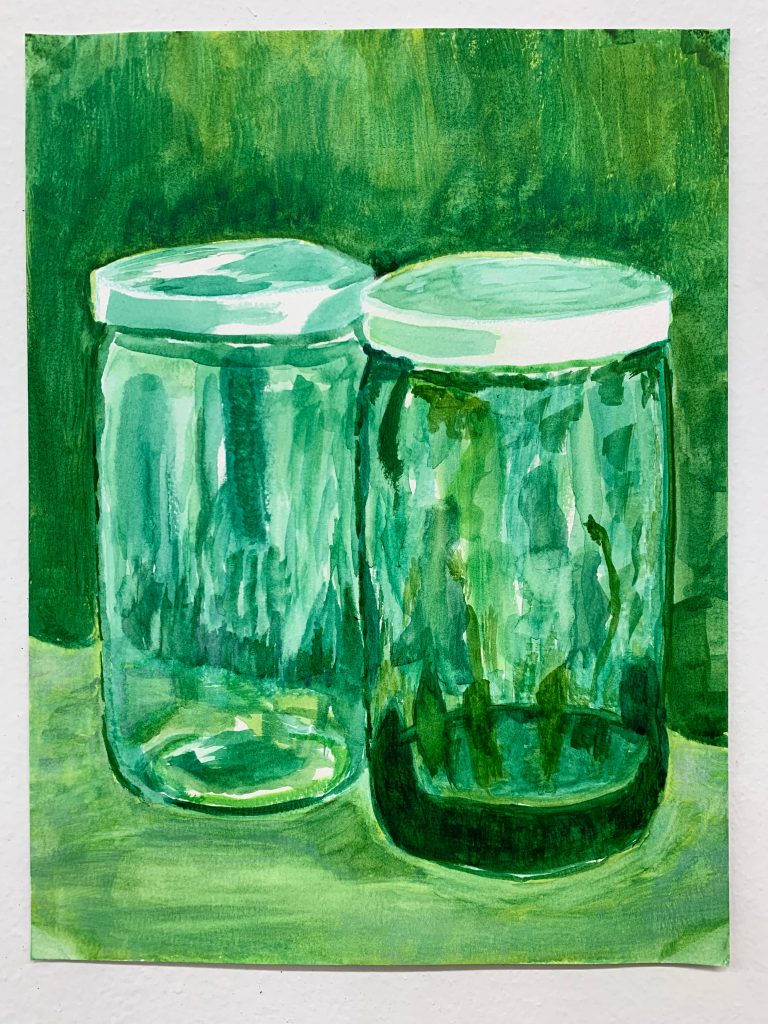
The still life had a lot of pastel green tones. To achieve that effect, we used a little bit of white in the watercolors, but we were careful not to overdo it. For the most part, my students operated by carefully dialing the ratio of water to pigment, patiently adding layers upon layers to build up the final result on the paper.
Finding Control in a New Medium
We dedicated a full three hours to this session. Looking at the final results in photo, it was a very interesting and successful exercise. In my returning participants, I notice a definite shift. They are absolutely improving, and their observational eye is acting much quicker and better.
My classes are never just about my students quietly following along and copying me painting a picture. It is about actively learning observation. It is very important that we have both of those aspects in our practice so that we can create and expand the palette of skills that we have.
I have one student who is currently taking both the acrylic and the watercolor class this month. I can see that watercolor has actually become the medium where she can truly relax, finding that she can control it even more than opaque acrylics. That is a great sign. It tells me that learning the thickness and color mixing of acrylics directly benefits her approach to watercolors.
Your Homework for This Week
Before I wrap this up, I want to leave you with some homework. I want to encourage all of you to create just 10 to 20 minutes of time during your weekdays to pull out your watercolors or your paints.
It does not even have to be a full painting. It could just be grabbing a pencil and sketching on a small piece of paper. Set an object in front of you. It could be as simple as a coffee mug, a cup, or even a fork. Give your eye something real to work with. Try to understand in the process how the object is constructed and exactly how the light reflects off its surface. Doing a brief sketch definitely helps to train your brain with drawing skills that will reflect heavily in your painting practice later on. Keep observing, and keep putting in the work.
Secure your spot in the studio:
- Tuesday Acrylics: https://www.artbeyou.com/acrylic-painting-course
- Thursday Watercolors: https://www.artbeyou.com/watercolor-painting-course
- Time: 6 PM to 9 PM
- Details: All materials are included. Classes are strictly limited to 6 seats per group to ensure high-level, personalized instruction.